
A broken part can stop a line, but the wrong replacement can stop it again an hour later. The difference usually lies in identification and measurement. This guide walks through how to replace a machine part correctly, from finding the part number to verifying the fit.
Stop and Document First
Before touching anything, collect information. Photograph the failed item from several angles, note where it sits in the assembly, and record how the machine behaved before it failed. These clues help identify the root cause.
Write down the machine make, model, and serial number. Copy any numbers or markings on the damaged machine part itself. A good record at this stage prevents errors later.
Find the Part Number
The fastest route is the manufacturer’s parts manual or exploded drawing. Match the item to the drawing, then read the part number and description. Data plates on the machine confirm the model and revision, which matters because designs change over time.
If manuals are missing, look for stamped numbers, casting marks, or supplier logos on the item. Cross-reference these with distributor catalogs. When in doubt, ask the supplier to confirm using photos and dimensions.
Take Accurate Measurements
Measurement is where most replacement errors begin for any machine part.
When no number exists, measure carefully.
- Clean the item so dirt does not distort measurements
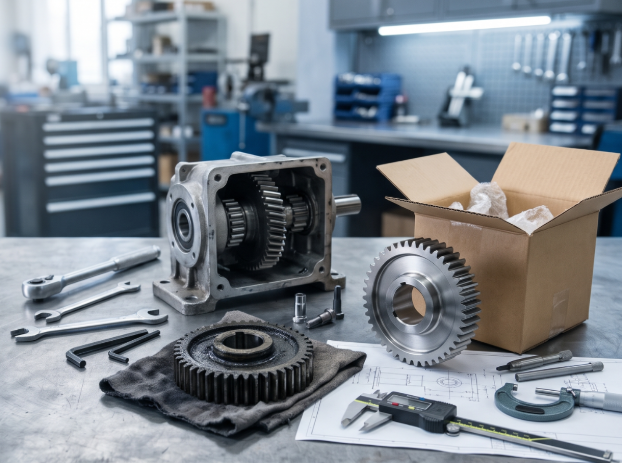
- Measure critical dimensions with calipers or micrometers
- Record diameters, lengths, thread sizes, pitch, and hole spacing
- Note the material and any hardness or finish
- Check wear on mating surfaces, since worn dimensions differ from original ones
- Make a sketch and label each measurement
Worn items mislead. A shaft that has worn smaller than its original diameter will produce the wrong replacement size. Compare with the mating part or measure an unworn area.
Decide: Original, Aftermarket, or Custom
Original Parts
Parts from the machine’s builder guarantee fit and often preserve warranty coverage. They may cost more or take longer.
Aftermarket Parts
Independent suppliers make equivalents. Check specifications, tolerances, and material, and ask for references.
Custom Parts
If a part is obsolete, a machine shop can make one from a sample or drawings. Reverse engineering requires accurate measurement and an understanding of function. It is a solid route for older equipment.
Whichever route you choose, match the specifications of the original machine part in material, hardness, tolerances, and finish.
Prepare the Order
A clear order is the best way to get the right machine part the first time.
Give the supplier all the information you have.
- Part number or drawing
- Machine model and serial number
- Quantity and urgency
- Material and finish requirements
- Photos and measurements
- Operating conditions, such as temperature and chemicals
Clear details reduce errors. Ask for a written confirmation of what will be supplied, including dimensions and material.
Inspect on Arrival
Before installing anything, check the incoming part.
- Compare it to the old item and the drawing
- Measure critical dimensions
- Check threads, bores, and mating surfaces
- Look for damage or defects
- Verify certificates if specified
A few minutes of inspection can prevent hours of rework. Reject parts that do not meet the specification.
Install It Properly
- Lock out and tag out power and air sources
- Clean mating surfaces and housings
- Replace related wear items, such as seals and fasteners, at the same time
- Use correct tools and avoid hammering bearings or precision parts
- Apply the right lubricant in the correct amount
- Torque fasteners to specification
- Check alignment where relevant
Many early failures come from improper installation. A careful job gives a new machine part its full service life.
Test Before Returning to Service
Run the machine at low speed and listen for abnormal noise. Check temperature, vibration, and leakage. Watch the part through several cycles, then increase to normal operation.
Retest after a short run-in period and recheck fasteners. Record the date and the results.
Keep Good Records
- Part number, supplier, and date of replacement
- Machine hours at failure
- Cause of failure
- Cost and downtime
- Drawings and measurements for custom items
This history guides stocking decisions and design improvements. It also speeds up the next replacement.
Conclusion
A reliable replacement process combines documentation, accurate measurement, correct sourcing, careful inspection, and proper installation. Plants that outsource unusual items should build a relationship with a machine parts manufacturer before an emergency, so drawings and samples are already on file. Follow the same steps each time, and replacements will go smoothly.